Self-made Tarp
2024-07-30

Every now and then I am on some sort of camping event or festival. And when you are a large group you want to have some sort of shared space where you can sit, cook, talk, cuddle, store electronics or your camping chair and get out of the sun or rain.
Cheap folding pavilions are readily available, however they are usually only 3x3m or 3x6m meters and rather shitty. They break after a couple of events and repairing them is hard. Spares are usually not available. There are better versions available, but those are expensive.
There are also party tents, but those are usually also expensive if you want to have the good stuff and often have tent poles that are 2m long. Those poles don't fit in regular cars. You need some sort of van to get those to places.
Finally there are tarps. I like tarps, because they are open to all sides which makes them rather welcoming. This also leads to some ventilation. There are many small tarps in the 3x3m to 4x4m range, but those are usually to small. There are bigger versions that are designed as stretch tents. They look really nice with their stretchy fabric and can be set up in different shapes. But those usually cost thousands of euros as well.
So, let's try to hack something that is rather cheap, strong, can be fixed/has spare parts available and fits into regular cars.
A tarp is probably the easiest thing to build, so that's what I did. You basically need:
- the tarp itself
- some poles to lift the tarp of the ground
- tent pegs and some sort of guy line
The Tarp itself
Initially I wanted to have a tarp similar to the tarp used on trucks. That stuff is usually made from PVC and weighs somewhere between 600 and 900g/m^2. It is also rather expensive (~150-200€ for 5x6m).
A somewhat cheaper option is a Polyethylene (PE) tarp. That is what the usual plastic tarps you probably know are made of. The ones you get in your hardware store are usually around 90g/m^2, sturdier ones might have 120g/m^2. Those are thin, break easily and not really confidence inspiring. However there are more robust versions available. I got one with 300g/m^2 which costs ~60€ for the 5x6m version. This is the heaviest version made from PE that I found. I might upgrade to the PVC ones when the concept works and the PE one is worn out.
The Poles
There are tarp poles that are readily available. However most of them are designed for small (think 3x3m) and light cloth tarps. My PE tarp weighs almost 10kg and a PVC version will be even heavier. so small and flimsy poles are out. The other problem is, that the poles need to be high enough so that people can stand under the tarp. My goal was that most people can enter through all sides. This means 1.8m should be the minimum height of the poles. To get some slope I needed at least an additional 0.5m for the larger poles. So I needed 2 poles that are at least 2.3m in height, more should be better. That rules out a lot of the remaining ready made poles.
In the end I settled for some old poles that were used by the German military to prop up camo netting ("Tarnnetzaufstellstangen"). Those can be found on eBay and army shops in Germany and are available in lengths of 1.2m, 0.6m and 0.3m + 0.1m for a coupling section. Those poles are ~4cm in diameter and made out of fiber-reinforced plastic. They can be coupled to build longer poles. I bought some of the 1.2m and 0.3m poles, because the 0.6m poles are rather rare and expensive. This gave me 2.5m for the long poles (2x1.2, + 0.1 for the connection piece) and 1.9m (1.2m + 2x0.3m + 0.1 for the remaining connection piece) for the short ones
In the end I payed ~100€ for the poles.
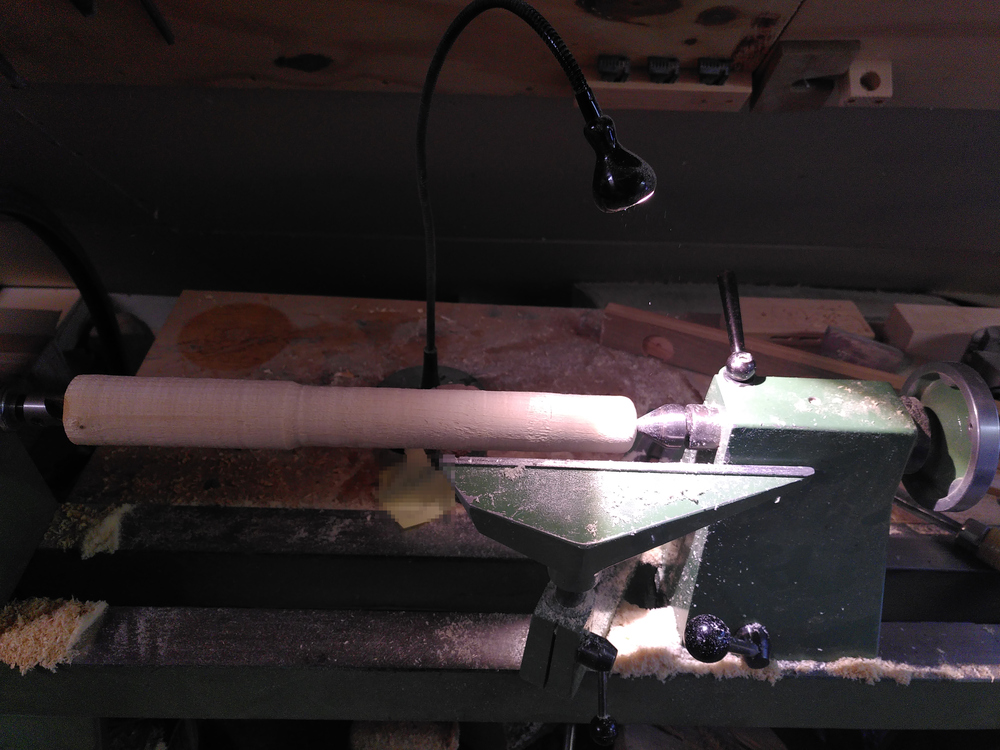
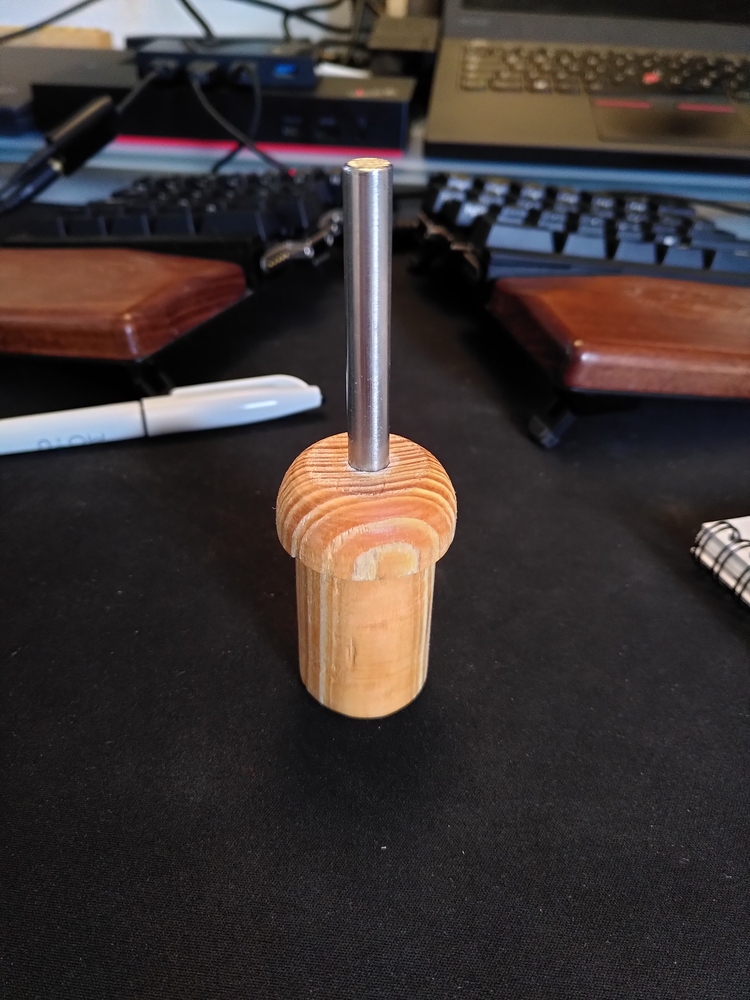
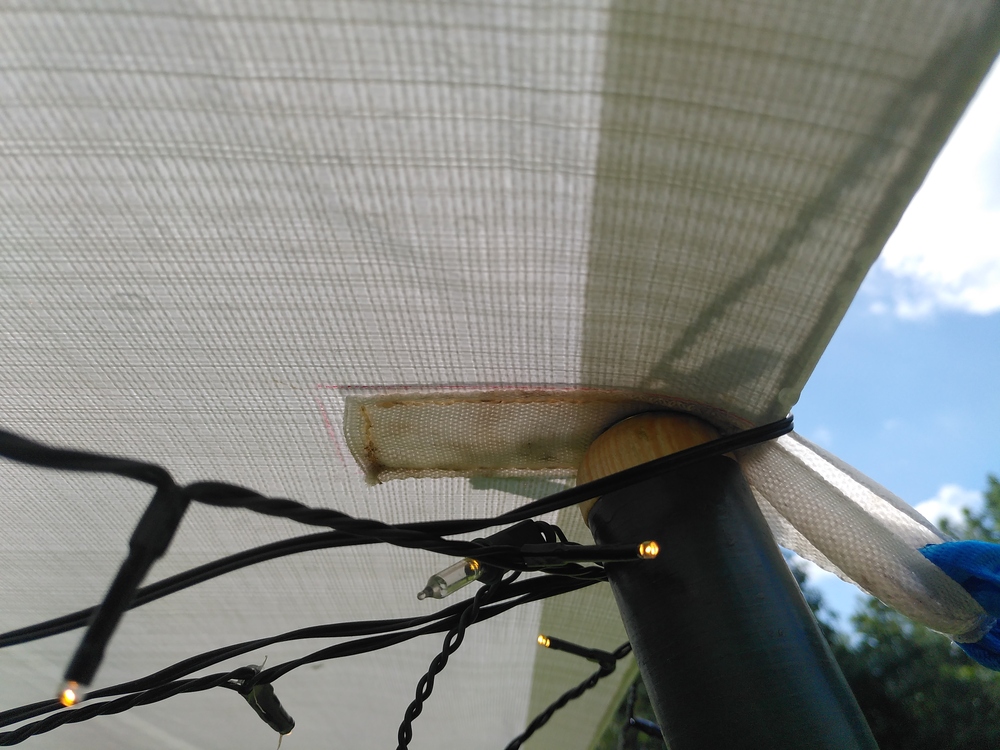
Now I need a way to attach the poles to the tarp. I got access to the wood lathe of a friend to build some wooden end caps for the poles. They are from cheap wood I already had. I added a steel pin into the end cap that can be inserted into the grommets of the tarp.
The Tent pegs and guy line
This tarp is rather large and has to withstand more force that a regular tarp. It also requires more force to tension it.
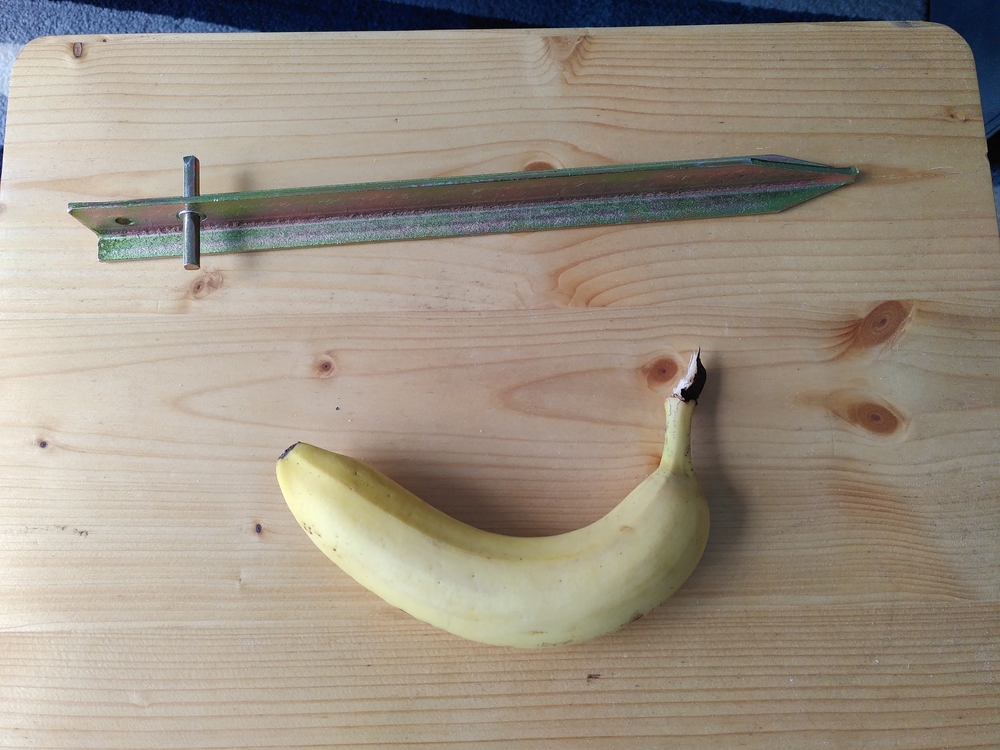
I decided to use large 30cm T-shaped tent pegs. I might have chosen larger ones, but the campground at CCCamp23 permitted only 30cm. (The tarp wasn't at CCCamp23 in the end...) And nothing stops me from replacing them later. To drive those pegs in I am using a small 2kg hammer. I also tried a smaller 600g hammer, but it takes forever.
For the guy lines I got inspired by bigger tents. Those often use ratchet straps. I decided to use cheap ratchet straps that are rated for 400kg which should be sufficient. I assume that something else breaks before the ratchets break.
The tent pegs did cost ~35€ and ~25€ for the ratchets.
First setup
The first time I set this up I used a small patch of grass on a playground in my neighborhood. The setup works well with 2 people.
The way to do it is:
- lay out the tarp
- build the poles
- lay the poles on the ground, starting at the grommets of the tarp, facing outwards in the direction the ratchet straps will face.
- drive in the tent pegs at the end of the poles.
- prepare the ratchets traps. If you insert the strap into the ratchet and tighten it just far enough that both segments of the strap overlap in the ratchet you can still tighten the strap by pulling on one end, but it stays in place when under slight tension. You can still cinch it down later with the ratchet. This is useful for a quick and easy setup.
- start by raising the first of the two long poles, tighten the strap, so that the pole is upright.
- Then one person has to hold that pole upright while an other one raises the opposing long pole and tightens it. When properly tightened one person holding one pole was sufficient to keep the tarp upright.
- then add both of the corners on one side. This should makes the tarp stable enough to stand by itself.
- then add the remaining poles
- make minor adjustments to the placement of the poles
- tighten the straps properly.
After this procedure we had a standing tarp.
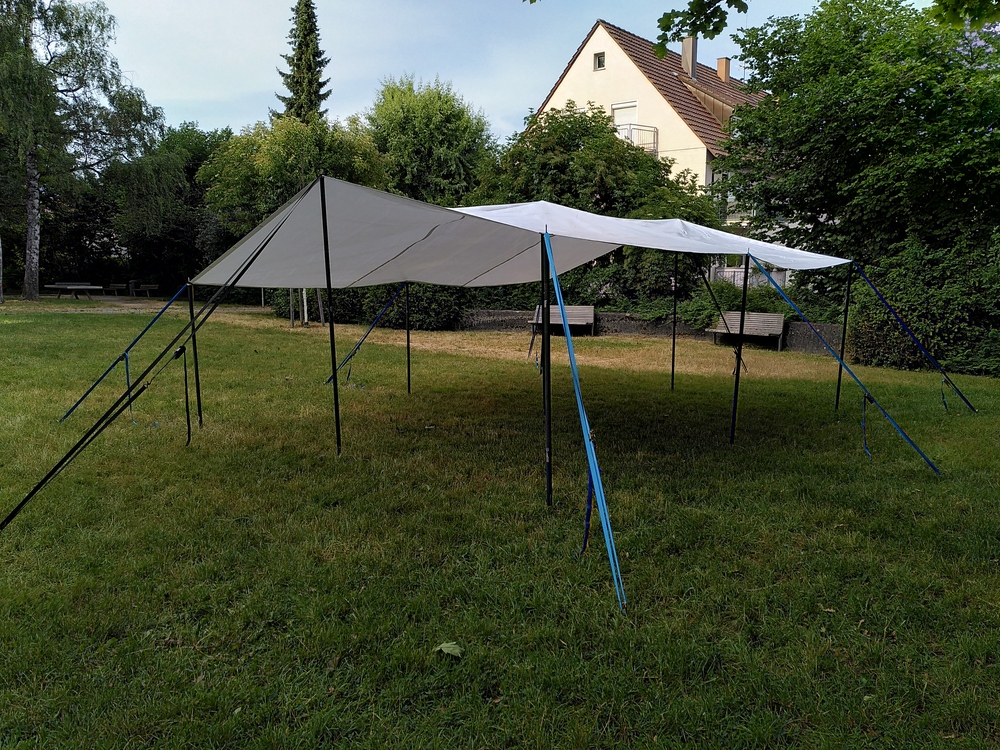
In this picture the poles on the far side are only 1.6m high while the ones on the front are 1.9m high because I did not have enough 30cm pole pieces.
Issues of the first setup and further improvements
One issue that I expected was that the middle might be sagging a bit and it did. So I had one further pole without a metal spike on the end and we added that one in the middle. It improved the sagging a lot.
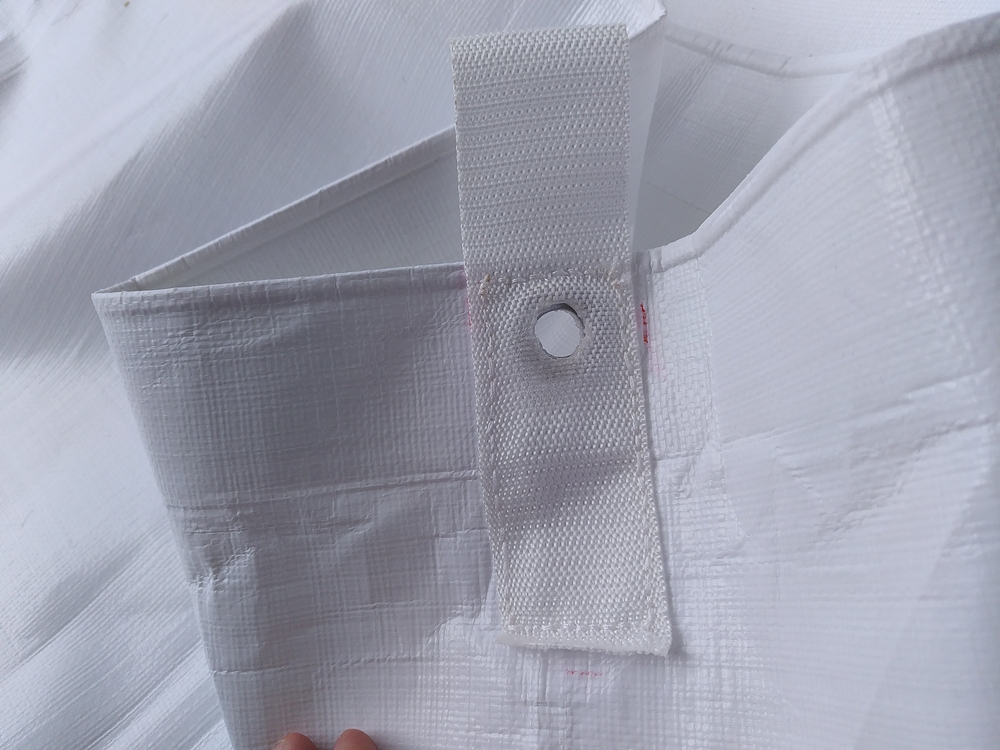
An other issue was that the grommets were not intended for the amount of force the ratchets put into them via the metal pins of the poles. The metal grommets got bent and they might separate from the tarp and wouldn't last very long. The issue here is that the force is distributed over a small piece of the tarp. To improve this I bought some strap. That was sewn onto the tarp to distribute the load. Doing this with a sewing machine was impossible, because I could not handle a 5x6m tarp in the sowing machine. It was simply to big, sturdy and heavy.
So after a lot of hand-sewing I had 4 loops on my tarp. I left out the corners as they were, because these had additional corner reinforcements and looked fine.
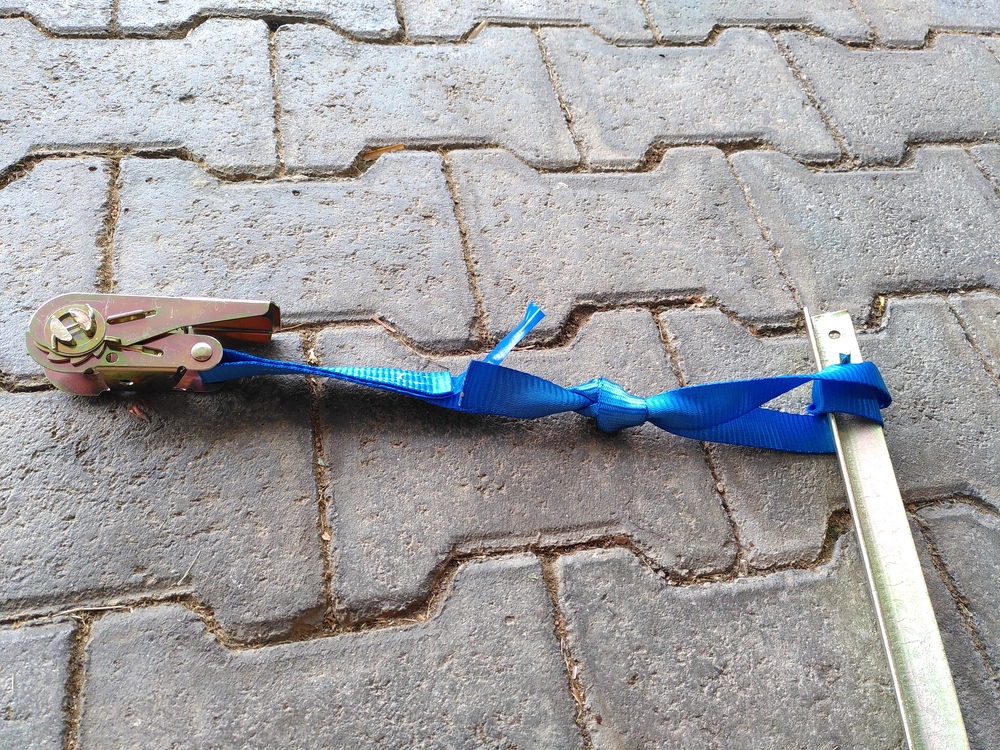
The ratchet straps also got an improvement. Initially I set them up as loops that wrap around the pole and the tent peg. I changed that. I cut off the strap 1m after the ratchet and tied a loop in the strap. Now they can be wrapped around the tent pegs. The remaining strap got a loop as well which can simply be hung over the pin in the pole. This also makes tensioning easier, because in the previous setup the strap could slip of the tent peg.
The straps were also inspected by professionals:
Second setup at FAT24
The first time the tarp actually got used was at FAT24.
The build up went smoothly with 3 people.
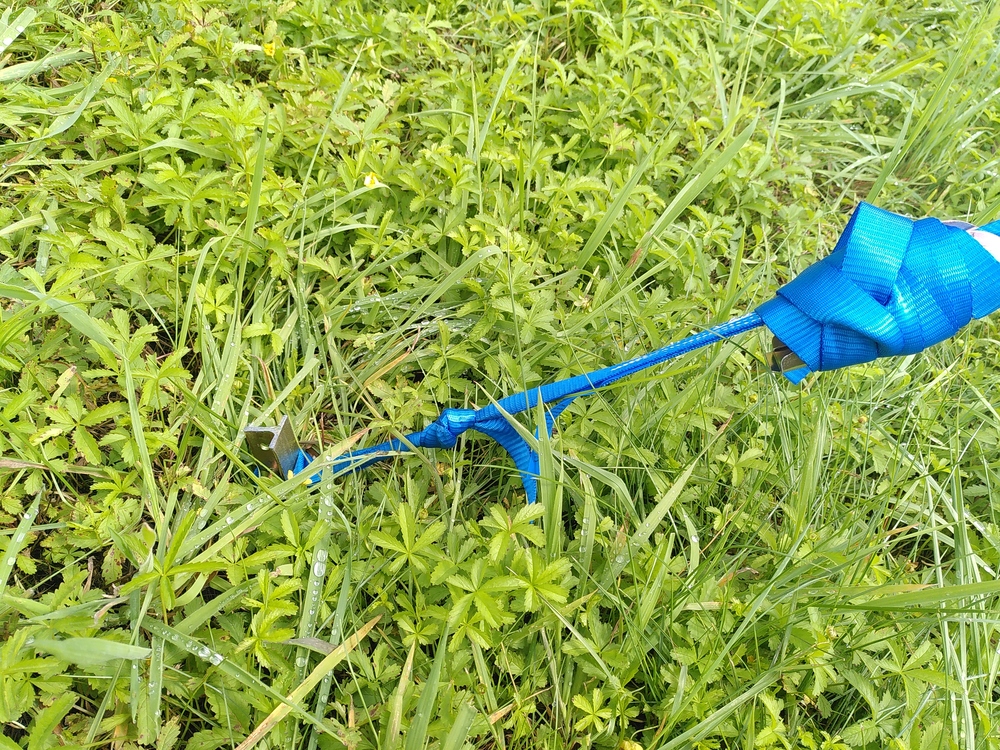
One issue we had was that the ground was rather soft and had several former molehills. We drove the pegs in to far vertically and they got pulled out a bit when tightened. We fixed that by placing them in better spots and driving them in at an angle.
An other issue with the soft ground was that the poles could sink in when under load. During the first test build up a friend of mine could climb up the pole and it carried the load just fine. This time the ground was soft and the pole sank ~10cm into the ground.
I will fix that by adding some sort of ground plate with a small divet in it to place the end of the pole into. This should distribute the load over a larger area.
We also realized, that the tarp is strong in all directions, but moves a bit more in rotation around the center pole. It is probably sufficient, because the tarp should not see a rotational force and the straps will eventually take the load. However using 2 straps on the corners in line with the adjacent edges instead of one strap diagonally outwards should improve this. So I ordered more ratchet straps and tent pegs.
Once the tarp was set up we wrapped the loose ends of the straps around the ratchets which gave it a really clean look. And we added some lights.
The tarp held up well during FAT24. It stayed dry during the rain and offered some shade. Build up, tear-down and the logistics involved worked fine. So this tarp will make it's way with further improvements to other events.